Reliable touch display assembly is not just a matter of placing a touch panel over an LCD. During touch display manufacturing, the touchscreen assembly process can fail at the points where glass, adhesive, electronics, cables, and the housing meet. A unit may look fine on a bench, then show bubbles, edge ghosting, or missed touches after final enclosure assembly. Good touch panel integration starts by treating those small interfaces as product-critical details.
You can see this issue across many touch display products, from compact smart frames to larger interactive screens. The use case changes, but the basic customer concerns stay familiar: Will the touch response remain stable? Will the screen stay clear? Can the device survive heat, humidity, shipping, and daily tapping?
Why Do Small Assembly Details Cause Large Failures?
Each part may pass its own inspection while the finished device still fails. The reason is simple. Assembly adds pressure, new ground paths, thermal stress, and dimensional variation. A tiny mistake can spread across the full display area.
Tolerance Stack and Alignment
A drawing should cover the minimum and maximum thickness of the cover lens, touch sensor, adhesive, LCD frame, gasket, and housing. Nominal dimensions are not enough. If the black border shifts by 0.5 mm, it may cover the visible area or reduce edge-touch sensitivity. Accurate touch panel integration also needs room for gasket compression and screw-driven housing movement.
Bezel and Gasket Pressure
Mechanical pressure is one of the less obvious touchscreen ghost touch causes. A bezel that presses the active area can change local capacitance. The fault may appear only after all screws are tightened. Set torque values, use a cross-tightening pattern, and inspect the powered display after assembly. A gasket is not merely a seal; it is also a spring pushing on the stack.
What Goes Wrong During Optical Bonding?
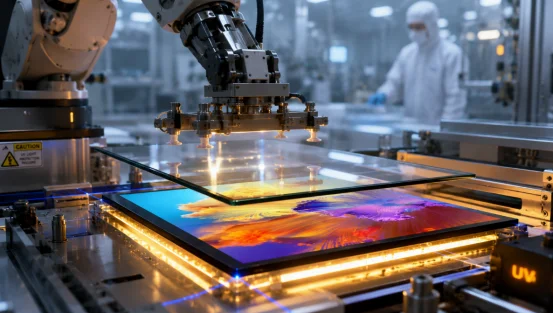
Optical bonding improves readability and gives the front surface a solid feel, but the process is unforgiving. Dust that is almost invisible before lamination becomes a permanent bright speck once the backlight turns on.
Cleaning and Surface Preparation
Common optical bonding defects begin with fibers, fingerprints, silicone residue, moisture, or particles left after protective-film removal. Plastic lenses can also release trapped gas. Controlled cleaning, ionized air, clean gloves, and a set time limit between cleaning and bonding help keep the surface stable. It sounds basic, yet this is where plenty of expensive rework starts.
Adhesive Choice and Ink-Step Coverage
The OCA lamination process works well when surfaces are flat and adhesive thickness is tightly controlled. LOCA bonding can fill larger gaps or uneven shapes, but cure control and overflow need close attention. The adhesive must also cover printed ink steps without leaving edge voids. Material compatibility should be checked against the sensor, polarizer, coatings, and plastic parts.
Pressure, Vacuum, and Cure
Too little vacuum traps air. Too much or uneven pressure can produce LCD Mura. Incomplete UV or heat curing may lead to edge lift and later delamination. Record the lamination pressure, vacuum level, speed, temperature, and cure dose for every production lot. This turns a visual craft into a repeatable process.
How Can Cables and the Enclosure Affect Reliability?
A clean front surface can distract attention from the back of the module. Yet cable routing and housing geometry often decide whether a display survives vibration, shipping, and repeated handling.
FPC Routing and Connector Locking
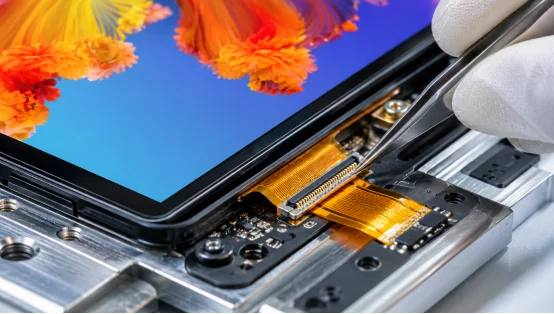
A reliable touchscreen FPC connection needs a suitable bend radius, full connector insertion, a locked latch, and strain relief. Do not fold the tail sharply beside the bonded sensor edge. It may pass final inspection and then crack after transport. The cable should not rub against a sharp plastic rib or carry force from the rear cover.
Sealing and Thermal Movement
Industrial touch display manufacturing often involves dust, humidity, and large temperature swings. Seal cable exits, fasteners, and enclosure joints, but consider pressure equalization in a tightly closed housing. Glass, plastic, metal, adhesive, and gaskets expand at different rates. Leave room for movement, especially near heat sources such as the backlight driver and processor.
For project-specific dimensions, interfaces, glass, brightness, and touch features, reviewing hardware customization options early can prevent a late enclosure redesign.
Which Electrical Details Are Easy to Miss?
Touch sensing measures very small capacitance changes. A layout that works on an open bench may behave differently once the LCD, power supply, antenna, metal frame, and cables are close together.
Grounding, Noise, and ESD Paths
EMI and ESD protection for touchscreens should cover the whole device, not just the controller board. Plan the relationship between controller ground, LCD frame, cable shield, metal housing, and chassis. Keep switching converters, backlight drivers, motors, and high-speed lines away from sensitive touch traces where possible.
An ESD component also needs a short, low-impedance path to ground. Long return paths let the discharge travel through the circuit you meant to protect.
Final Touch Controller Calibration
Touch controller calibration should be checked after the final housing, gasket, grounding, power system, and cables are installed. Test dry fingers, gloved use, wet surfaces, edge touches, multi-touch gestures, charger operation, and maximum backlight brightness. A screen that works in a quiet lab may struggle beside a switching supply. That small detail matters in service halls and factory panels.
What Should Be Checked Before Mass Production?
Before mass production, touch display assembly should be judged as a complete system. The best display assembly quality control plan tests the finished product, not isolated components. A practical review combines appearance, touch behavior, mechanical integrity, and traceability.
Final Inspection and Reliability Tests
Inspect the unit powered and unpowered. Use white, black, and low-brightness screens to reveal bubbles, haze, light leakage, scratches, Mura, and adhesive overflow. Run full-screen touch mapping, including edges and corners. Then check thermal cycling, humidity, vibration, ESD, and repeated touch use. The touchscreen assembly process should also record the LCD lot, sensor lot, adhesive lot, firmware version, calibration file, and rework history.
Large interactive units, including digital signage displays, deserve final testing in their real mounting position. Wall pressure, cable direction, and nearby power hardware can change the result.
How Does YIAISIGN Support Touch Display Projects?
When your product needs more than an off-the-shelf panel, supplier coordination becomes part of assembly quality. YIAISIGN develops digital display products and supports OEM and ODM work across hardware design, product appearance, interfaces, touch features, software integration, sampling, testing, and production. Its product scope includes smart frames, all-in-one units, digital signage, portable monitors, and related display devices.
That mix matters because touch display assembly rarely sits in one engineering box. The screen, enclosure, control system, and user interface have to work as one product. For buyers, the useful point is practical: one supplier can review more of those connected details before tooling and mass production.
FAQ
Q1: What Is the Most Overlooked Detail in Touch Display Assembly?
A: The tolerance stack is often missed. Small variations in glass, adhesive, gasket, LCD frame, and housing can create pressure, alignment, or sealing problems.
Q2: What Causes Optical Bonding Defects?
A: Typical causes include dust, moisture, trapped air, plastic outgassing, poor ink-step coverage, uneven pressure, and incomplete adhesive curing.
Q3: When Should Touch Controller Calibration Be Performed?
A: Check it after final mechanical and electrical assembly, then repeat key tests under wet, gloved, noisy, and edge-touch conditions.
Q4: Why Is the Touchscreen FPC Connection Important?
A: A loose connector, tight bend, or missing strain relief can cause intermittent touch, dead areas, or failures after vibration and shipping.
Q5: What Does Display Assembly Quality Control Include?
A: It should cover optical inspection, full-screen touch tests, grounding and ESD checks, environmental testing, firmware control, and lot traceability.