You purchase an Android All-in-One PC and want to get into it. Be it for personal use, business, or industrial application, getting the device up right is the only way to reap its full potential. Android All-in-One PCs are a perfect blend of simplicity and power, and here, we will walk you through the whole setup process, starting from unboxing and going all the way to the customization of your device.
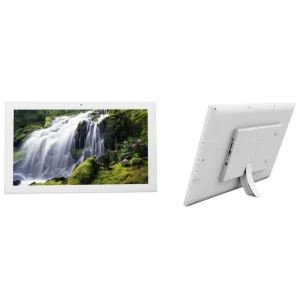
Whether customized Android All-in-One PC or upgraded for reliability, 23.6-inch and 21.5-inch Android All-in-One machines from Shenzhen Yijing Technology Co., Ltd. will be of good service in both business and industrial aspects.
What is an Android All-in-One PC?
It adds Android comfort in combination with efficiency from traditional desktops. Unlike any ordinary desktop available in the market, these offer big touchscreen display facilities and don’t require having any separate units for computers, thus having sleek profiles, space efficient, and really appealing. Using it for everything-from entertaining oneself to important digital signage industrial uses-and all, Android All-in-One mesh together the easiness of using an Android system with the output a well-working desktop will produce.
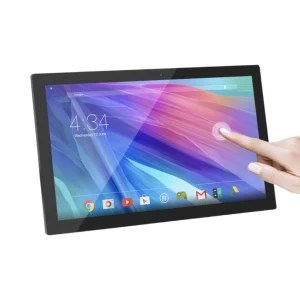
Such a device like YIAISIGN 23.6-inch Android All-in-One PC features HD display and industrial-strength builds for high demanding environments.
Step 1: Unboxing and Initial Setup
1. Unboxing and Inspection
Carefully unbox your Android All-in-One PC, making sure everything is included: usually the unit itself, a power adapter, and cables. Other inclusions may be a keyboard or mouse. Take a moment to check the machine for any shipping damage.
2. Power Supply Connection
Go ahead and attach the power supply:
- Locate the power input port, usually located on the back or side. ·
- Plug the power adapter into the port and connect it to a nearby electrical outlet.
3. Powering On
To turn the device on, press the power button, usually located on the side or rear of the display. The screen should illuminate, and the Android operating system will begin to load. Within moments, you’ll be greeted with the familiar Android interface, ready for configuration.
Step 2: Navigating the Android Interface
Once the device is powered on, you will be presented with the Android home screen, which is somewhat similar to the interface one would already know through smartphones and tablets.
1. The Home Screen
The home screen is basically where your Android All-in-One PC starts. It’s a place where you can access your apps, widgets, and settings. You can easily add or remove apps and widgets from there. This feature is very suitable for both business and personal uses.
2. How to Use the Settings Menu

The settings for your Android All-in-One PC can be accessed by tapping on the gear icon, usually positioned at the top right-hand corner. There you will have system options like Wi-Fi, Bluetooth, Sound, Display, among others.
3. App Drawer
You can see all the applications installed on your device by swiping up from the bottom or via the icon. From here, you can organize your applications or install more using the Google Play Store.
4. Notification Panel
The Notification panel opens by swiping your finger from top to bottom. The panel displays alerts, messages, and quick options for setting the volume, turning Wi-Fi on/off, among others.
Step 3: Wi-Fi Connection
Wi-Fi connectivity will be required for application downloads, data synchronization, and online service access.
1. Wi-Fi Settings
Using the Settings menu, select the option for Wi-Fi; this will list on your device a series of available networks.
2. Select and Connect
Select your Wi-Fi network from the list, enter the password if needed, and click Connect. The network will instantly be saved in your Android All-in-One PC for future use.
Step 4: Setting Up Your Device
With your Android All-in-One PC now connected to the internet, it is time to make the device truly yours by adjusting settings and installing necessary apps.
1. Adjust Display Settings
Settings menu: Tap Display to set screen brightness, font size, and screen timeout, among other options. You can even set up a screen lock for added security.
2. Sound Settings
In the Settings menu, tap on Sound to fine-tune your audio. You can adjust volume levels, change notification sounds, and set other audio preferences.
3. Installing Apps
Install the Applications: Open Google Play Store, search for any application, and tap the option Install. After installation, you will either directly use it from the home screen or app drawer. You can install productivity tools, applications that give you entertainment, or some specialized software suite for your business.
4. Setting up Accounts
Add your personal and work e-mail accounts in Accounts in the Settings. Let the operating system sync your files across devices with ease by linking your cloud storage services such as Google Drive, Dropbox, or OneDrive.
Step 5: Attaching Peripherals and File Transfer
Android All-in-One PCs are quite versatile and support a wide range of peripherals for an extended user experience. You can easily attach a mouse, keyboard, or even a printer. The steps to do so are as follows:
1. Attaching USB Devices
Find the USB ports on the device, plug in your USB devices (e.g., keyboard, mouse, external storage), and the system should automatically detect them.
2. Bluetooth Connectivity
You can use Bluetooth devices if you have wireless peripherals. You can go to settings, select Bluetooth, and enable it. Your device will start searching for any paired Bluetooth devices. Click your peripheral, then follow any other instructions prompted for pairing.
3. File Transfer with a USB
Transfer Files Connect your Android device to the PC using a USB cable. From your Android device select File transfer or MTP mode, and your PC will detect the device, from where you can simply drag and drop files between devices.
4. File Wireless Transfer
For wireless file transfers, use AirDroid or Microsoft Phone Link. In fact, these will let you handle files, screen mirror, and send messages from your PC.
Step 6: Making the Most of Your Android All-in-One Desktop
With everything running, there are just a couple of other things you should do to make sure your All-in-One is running at its best and is as functional as it can be.
1. Keep It Updated
Install the new software patches and security updates; keep your device updated. This will ensure that it remains functional and safe over time.
2. Customize Your Home Screen
Set up your home screen to place the apps you use frequently alongside the available widgets for easy access. This is important, especially for business environments when you might want to get rapid access to many apps all at once.
3. Look into Accessories
Adding a Bluetooth keyboard, wireless mouse, or stylus will make the user experience even better, adding in productivity and making the navigation even easier.
4. Cloud Integration
Integrate cloud storage, such as Google Drive or Dropbox, to make your files accessible with all devices in harmony. This keeps your files synchronized and accessible from anywhere.
Step 7: Need a Reliable Android All-in-One PC? Go for YIAISIGN.
If you’re in the market for a reliable Android All-in-One PC, consider Shenzhen Yijing Technology Co., Ltd. and their YIAISIGN brand. With over 15 years of experience in the display industry, YIAISIGN specializes in Android All-in-One PCs, offering a range of solutions including 23.6-inch and 21.5-inch models.
Why Choose YIAISIGN?
- Expertise: With over 15 years in the industry, YIAISIGN offers unmatched knowledge and experience.
- Personalization:YIAISIGNoffers personalization options for both software and hardware. All-in-One PCs can be personalized to fulfill various business requirements, starting from software options down to branding to packaging.
- Quality: YIAISIGN manufactures internationally accredited products such as ISO9001, RoHS, CE, FCC by following standards for making quality but compliant products.
- Global Network: YIAISIGN also sells its product line in the global perspective but is majorly recognized in Europe, the Americas, Oceania, and the Middle East.
- Comprehensive Solutions: They offer a full gamut of services, from ODM/OEM solutions to software development and hardware customization, based on the particular needs of a business.
High-Tech Technology, High Performance, and Reliability-On with the Android All-in-One PCs from YIAISIGN Itself that is Keen for Innovation and Customers Satisfaction.
Ready to Get Started?
Setting up your Android All-in-One PC is not only effortless but also full of possibilities. In just these easy steps, one will have his device running. Be it work, entertainment, or even an industrial usage platform, your new Android All-in-One PC is one powerful device intended to further spice up your digital experience. With YIAISIGN, you get a product that is performance-oriented as much as durability goes.